
The May boys kit has so many wonderful embellishments in it this month, but what I fell in love with (besides the robots and aliens) were the die cuts. I wanted to include the bubble thought die cut in my long title for this layout below, but did not want to write on it.

I decided I wanted to use a cool font called 2Peas Fragile.
To achieve this look, I opened up a new Word document, and typed out the text how I wanted it to look on that cute die cut.

I then printed out a test run on a sheet of regular printer paper.
**this is important**
Pay attention to how your paper comes OUT of the printer, because in a second, we'll be placing the paper back in the printer the same way.
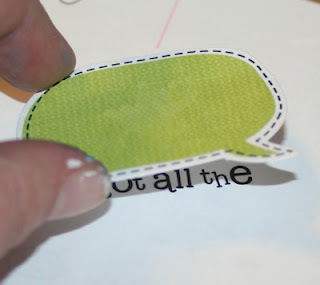
Grab your die cut, and place a small amount of temporary adhesive on the back.
Line it up with the text you printed out from your test run, and adhere it down.
(If the text your printed is too large, or too small, just edit in word, and re-print until its sized appropriately)

Place your paper back in the printer according to how it came out.
For instance, once my test run had finished printing, the text was facing away from me,

so I had to put my paper in upside down, with the die cut closest to the printer ribbon

Once you're sure it's facing correctly, hit print in your Word document again... this time, the text will print on your diecut. Remove the diecut from your test paper, and adhere it to your layout!

Have a great day!
Leah
Very cool!! glad to see that!
ReplyDeleteWhat a neat idea! I never would have thought of that! I will have to try this out! Thanks!
ReplyDelete