Showing posts with label Scrapbooking. Show all posts

Tuesday, June 8, 2010

First glance inspiration - Fancy Pants My Family

At first glance there were three things that really grabbed my attention when I opened this fabulous boy kit ~ Fancy Pants My Family.

  • The warm homey rustic colors in the papers
  • The fantastic journal sheets from Fancy Pants
  • A sheet of paper from My Family FP line, Cards

The strip you see missing from that sheet of paper above is what struck my creative energy. My photos do not do these fabulous products justice, but I had to give you a nice close up of the goodies that I've been playing with. ;)  I even created a sketch this month... I don't do that very often, so you know the creative juices were flowing. You know Lindsey Krauss creates fantastic sketches, so this isn't the official sketch, but one I came up with for my first layout.

I absolutely LOVE the size of the journal sheets. Their big enough to house a 4x6 photo and still leave room for journaling... or you could actually just use them for telling your story. So much diversity with these, you can't go wrong. The itty bitty squares with the words family, joy, love, etc... *swoon* they would even be great for card making.


Look for the kits to be released June 15th in the store. Taryn put some wonderful products together this month, and I can't wait for you to get your hands on them! Keep checking back for more inspiration from your Design Team here at Top Shelf Memories!

xoxo,
Leah

Monday, May 10, 2010

Printing on die cuts

The May boys kit has so many wonderful embellishments in it this month, but what I fell in love with (besides the robots and aliens) were the die cuts. I wanted to include the bubble thought die cut in my long title for this layout below, but did not want to write on it. 
I decided I wanted to use a cool font called 2Peas Fragile
To achieve this look, I opened up a new Word document, and typed out the text how I wanted it to look on that cute die cut.

I then printed out a test run on a sheet of regular printer paper. 
**this is important**
Pay attention to how your paper comes OUT of the printer, because in a second, we'll be placing the paper back in the printer the same way.

Grab your die cut, and place a small amount of temporary adhesive on the back.
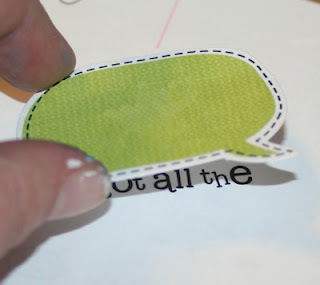
Line it up with the text you printed out from your test run, and adhere it down.
(If the text your printed is too large, or too small, just edit in word, and re-print until its sized appropriately)

Place your paper back in the printer according to how it came out.
For instance, once my test run had finished printing, the text was facing away from me, 

so I had to put my paper in upside down, with the die cut closest to the printer ribbon

Once you're sure it's facing correctly, hit print in your Word document again... this time, the text will print on your diecut. Remove the diecut from your test paper, and adhere it to your layout!

Have a great day!
Leah